Save on heating thanks to home automation, it works!


Sommary
This is an article dedicated to the home automation of a traditional gas boiler with radiators connected to water circuits. Home automation will bring you comfort, financial savings and foolproof adaptability. This article is written to complement the video shot by August and Lulu on the subject. Two friends who are discovering home automation and who share their feelings with you. To finish you will be able to realize that for a minimal cost you will be able to make a return on investment over two years Maximum.
Prérequis
- a home automation box Home Assistant Green or Sonoff Ihost
- If you use the Home Assistant Green you will need a Zigbee Skyconnect key
- thermostatic modules TRV Sonoff preferably.
- modules temperature and humidity thermostats (Sonoff brand preferably)
- a multifunction module Nodon SIN-4-1-20 dry contact (to control the switching on and off of the boiler)
- skills if you have them it’s better
You should know that in home automation there are several ways to do it as they say: all roads lead to Rome.
Warning
You will have to work near a voltage of 220V which is dangerous if you come into contact with an electrical conductor. Take care in your handling, if in doubt cut off the power supply.
I will detail the products used, as well as the setup on Home Assistant. Through a very clear installation, I enhanced this mechanism using automation, templates and Blueprint. Don’t worry, it’s not that complicated, especially over time Home Assistant has been able to adapt and make its interface usable even to the most novice among you.

The material
At August, we decided to go with a Home Assistant Green box with a Skyconnect zigbee hub to control zigbee modules. But you could also go with a Sonoff ihost box with integrated Zigbee key if you want to home automation certain aspects of your home, be careful with automation which will be more difficult to configure. Indeed, the Home assistant green box is compatible with the gigantic Home assistant universe and what’s more, you participate in the opensource project by investing in their Boxes and keys, and I find that nice.

Info
For your information, there is also the Home Assistant Yellow box which includes the Zigbee key but the price is more expensive, for the job it remains the same.
Home Assistant Yellow
For the thermostat heads we went with the TRV modules from Sonoff, in a previous Sonoff/Xiaomi/Moes comparative article It turns out that it is the Sonoff which came out the best in terms of aesthetics/operations/quality/price.

Info
For Info At Itead official supplier Sonoff the module is $26.9 excluding tax + 10% discounts from from 3 or 10% additional discounts with the code HAADESONOFF when purchasing a module, which is exceptional
Sonoff TRVZB module
Then you will need a dry contact module which will control the open/closed function of your boiler (Gas, Oil and even heat pump), there are several on the market, I selected the module Nodon multifunction SIN-4-1-20 because it is very well made, moreover you can read a review on this subject.
Finally, I strongly advise you to equip each room with a micro-temperature module,** Why: The thermostatic faucet is equipped with an integrated thermostat however the temperature is distorted during operation due to the proximity to the heating body, moreover it is even more relevant when you have two radiators in the same room.
You will see more below that with the help of a simple Blueprint you can ask Home Assistant to calibrate the thermostat of the faucets on the thermostat of the room it’s a real more 👌.
In the range of thermostatic micro-modules the choice is vast, I recommend another module Sonoff the SNZB-02P, it is reliable, aesthetic and inexpensive. here too I tested the Sonof SNZB-02P, don’t hesitate to consult.

Info
For Info At Itead official supplier Sonoff benefits from 10% additional discounts with the code HAADESONOFF
Sonoff SNZB-02P Temperature Module
The cost of returning to August
- the box Home-Assistant Green at 99,99€
- the key skyconnect à 39,99€
- the 5 TRV Sonoff thermostatic valves at €27.20 including tax delivered per unit i.e. €136 (ITEAD)
- A Nodon micromodule at 39,99€
- 2 SNZB-02P thermostats at €12.95 per unit or €25.9 for both (ITEAD)
Total: 341,87€
Setting up
Start by inserting the Skyconnect key on the box Home Assistant Green plug in the rj45 cable and power the box, let it run for a few moments and then connect to the address http://homeassistant.local:8123 and yes it’s plug’n play 👍.
For more information on these manipulations I wrote an article on the Home Assistant Green and the Skyconnect key
Then you have the choice to configure the zigbee key or you go through the ZHA module integrated into Home Assistant either by the Zigbee2mqtt add-on, It depends on your vision of things in any case for writing this article with the modules mentioned ZHA and Zigbee2mqtt working.
Personally I have a preference for Zigbee2mqtt which integrates a lot of modules.
ZHA settings
nothing could be simpler, go to Settings > Devices and services > Add an integration and type ZHA click on Zigbee Automation, and normally ZHA should find your key and even be selected by default: /dev/ttyUSB0 - SkyConnect v1.0, s/n: ae253a5057e2ed119602f45162c613ac - Nabu Casa
Zigbee2mqtt settings
Here it’s a little more complicated, Z2M needs an MQTT broker to communicate with Home assistant so you must first install the official Mosquitto module.
Settings > Add-ons > Add-ons Store > Mosquitto Broker > Install
Once installed go to Mosquitto Broker > configuration
In the Logins section paste this piece of code
- username: username
  password: pass
Dernière étape copie l’username et le pass tu en auras besoin dans Z2M, vas dans info puis démarrer, laisse le temps à Mosquitto broker de démarrer.
Let’s install zigbee2mqtt
First step install the additional repository for add-ons, click on the link below:
Add it and close the popup. Refreshes the Add-ons Shop page with a small F5 on the keyboard. Scroll down to find the Zigbee2mqtt directories and simply install Zigbee2mqtt
Then in the Zigbee2mqtt module go to the configuration tab add
mqtt tab:
server: mqtt://core-mosquitto:1883
user: username mosquitto
password: pass mosquitto
serial tab: find the exact serial port of your key in Settings > Systems > hardware > all hardware
port: >-
  /dev/serial/by-id/usb-Nabu_Casa_SkyConnect_v1.0_ae253a5057e2ed119602f45162c613ac-if00-port0
adapter: ezsp
completes by starting the installation before leaving the page select the “show in sidebar” option
Inclusion of Zigbee modules
To include a module, read the module instructions and before proceeding with inclusion, enable pairing in ZHA or Z2M. For ZHA click on the button below.
Then you have two minutes to carry out the manipulation on the zigbee modules, I always advise you to start by including the modules connected to the sector like the Nodon, and then connect the modules to batteries.
TRV Sonoff: To pair the device, you must first power it, attach it to the valve and display the temperature. If the device displays FS or RD, press the button on the side of the device and it should now display ,,7. Once it stops flashing, hold the button for about 5 seconds, at which point the device should now display the temperature. Continue to turn the dial counterclockwise until the screen displays OF and finally hold the top button for 3 seconds. You should now see a flashing signal icon and it will try to pair.
SNZB-02P: Press the button for 5 seconds
Nodon SIN-4-1-20: Press the press button using a needle for 5 seconds
Virtualization and preparation
At this stage you have the modules in your operational Zigbee network, but nothing is optimized yet, you will have to create virtual ones and automations now.
Let’s start with the heating modes.
For the good of housing August wanted to create modes in drop-down lists so we will create a virtual drop-down list with the options Eco and comfort
PS: I could have created a boost mode but I decided to integrate it differently in one of the automations.
Let’s continue creating virtuals
for each thermostats we will create a virtual binary and then I could create a virtual group in the form of a template of all the thermostats, this will be simpler for future management of automations. At first glance it seems tedious but it will simplify the rest.
So let’s create a binary “ON/OFF” sensor template for the living room thermostat by monitoring the running_state attribute which tells us when the thermostat is in Heat heating mode or in Ìdle off mode. . I take this opportunity to transform Heat into an ON or Activated function and Idle into an OFF or disabled function. Watch the animated gif and copy this piece of code by adapting climate.th_salon
{%- set result = state_attr('climate.th_salon', 'running_state') %}
{%- if result == 'heat' %}
{%- set result = 'on' %}
{{ result }}
{%- else %}
{%- set result = 'off' %}
{{ result }}
{%- endif %}
Create a template for each Sonoff TRV Thermostatic Faucets.
Let’s move on to the binary input group created previously. Always the same in the interest of creating automation we centralize all these controls in a group of trv Sonoff thermostatic faucet management systems.
In addition to creating this group we will leave the option All entities on disabled so this group will change to activated if one of the thermostats starts to heat up so we can send the right command to the contactor which will control the boiler in our case the Nodon SIN-4-1-20 test article is written here you will be able to see the dry contact connection diagrams for a boiler.

Create temperature averages
This function is not bad if you want to more easily control temperatures in automations without overloading the functions. In the script below I record the temperature probe attributes of the modules and I display the average with a rounding of two digits after the decimal point.
{% set salon = state_attr('climate.th_salon', 'current_temperature') | float %}
{% set bureau = state_attr('climate.th_bureau', 'current_temperature') | float %}
{{ ((salon + bureau) / 2) | round(2, default=0) }}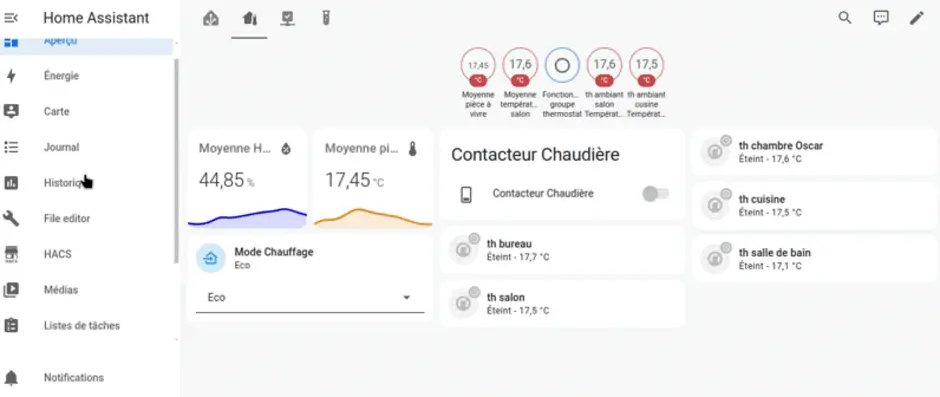
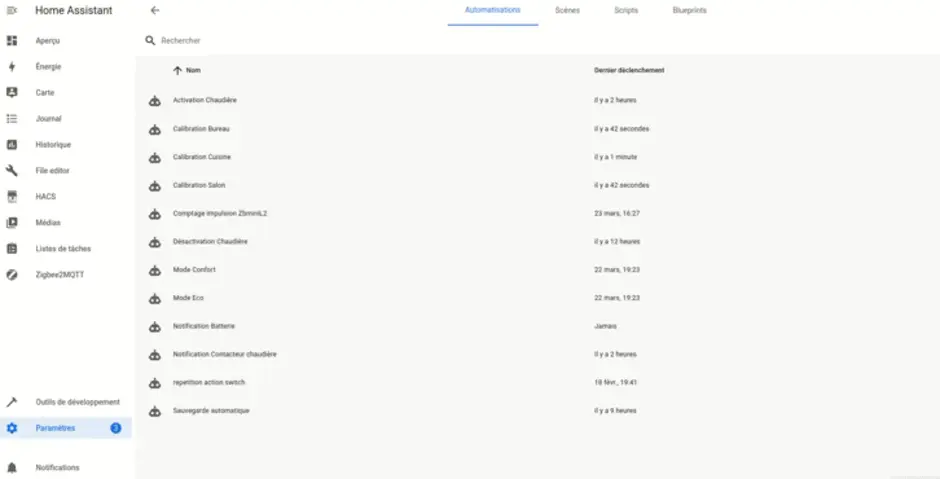
Automations
In this chapter I will create 4 automations
As explained above there are other ways of doing things with modules like Versatile Thermostat created by Jean-Marc Collin which takes care of a whole bunch of functions such as heating modes, the module is complete but that makes it a gas factory to configure, it alone will save you energy.
Eco Mode
When the mode changes to Eco all thermostats calibrate to 17°C

Comfort mode with Boost function
In addition to the Eco function, comfort mode includes a 7-minute Boost condition when heating is started to allow the temperature to rise quickly and stabilize everything at 20°C. I put a condition on the boost mode, it only turns on if the average of the living rooms is less than 19° if this is not the case it will go directly to the target temperature at 20°C
Boiler activation
Before you can create the boiler activation and deactivation modes, you will need to replace the boiler’s remote thermostat with a zigbee contact-dry module, in this installation I went with a Nodon SIN-4-1-20. Some boiler thermostats run on batteries, your dry contact module needs power, for the rest you just have to follow the connection diagram.

This is when one of the taps turns on, the automation starts and activates the boiler contact if the temperature outside the house is lower than 16°C
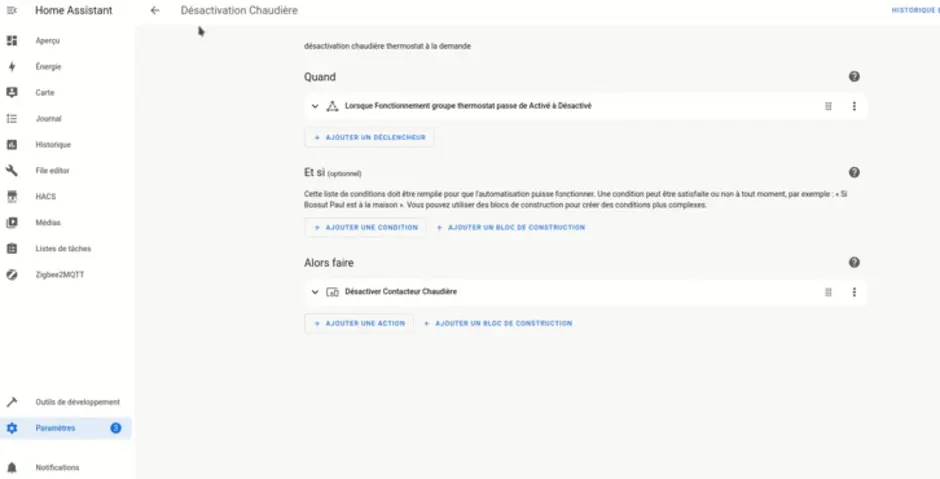
Boiler deactivation
When the thermostat group template created previously changes to disabled (no taps required) then the contactor switches to disabled and turns off the boiler, simple no!
Interesting functions
In our case it is a question of optimizing the temperature probe of the thermostatic taps, located directly next to the heating body, you may well think that the faucet temperature measurement is distorted due to its proximity. To avoid these inconveniences we put a Sonoff SNZB-02P thermostat in each room and thanks to the blueprint below we ask home Assistant to calibrate the temperature of the thermostat according to the central thermostat of the room so we have a temperature compliant a real plus. To install the Blueprint, nothing could be simpler, click on the button below.
PS: A blueprint is a script that will generate personalized automation for you and you will only have to configure it! Ideal !

Another interesting function is to use the companion application for Home Assistant (Android and iPhone compatible) and activate geolocation so you could ask Home Assistant to automatically put it in eco/comfort mode depending on your presence. August prefer to do it manually.
Energy savings
As announced in the video, home automation of your heating installation and optimization of room control will save you money. In the diagram below I compare the Engies energy readings of August, they are real and not fake, we started with a comparison November 2023 - February 2024 because the average outside temperature recorded over these periods was similar, i.e. 8°C.
You can see that in February consumption fell by 312KW.

On this diagram that represents a saving of €29 over these two similar periods.

It’s always nice to receive this kind of message.

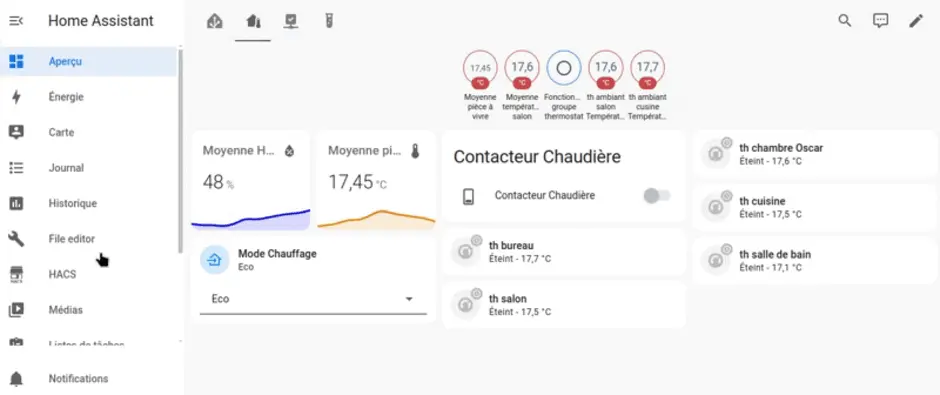
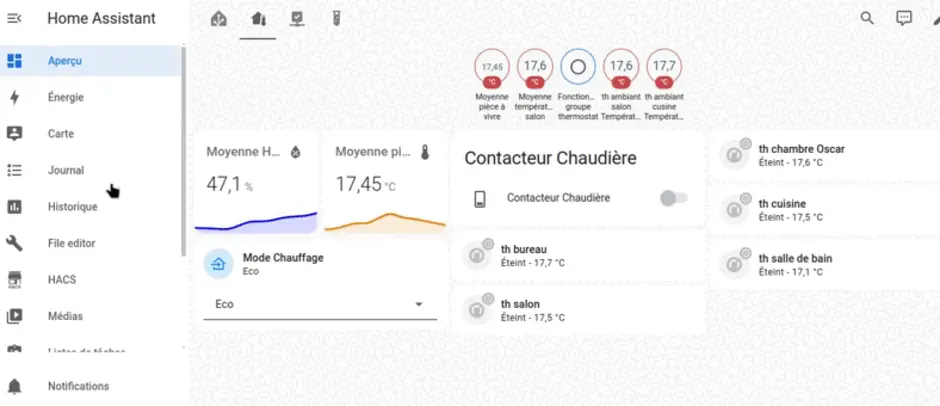
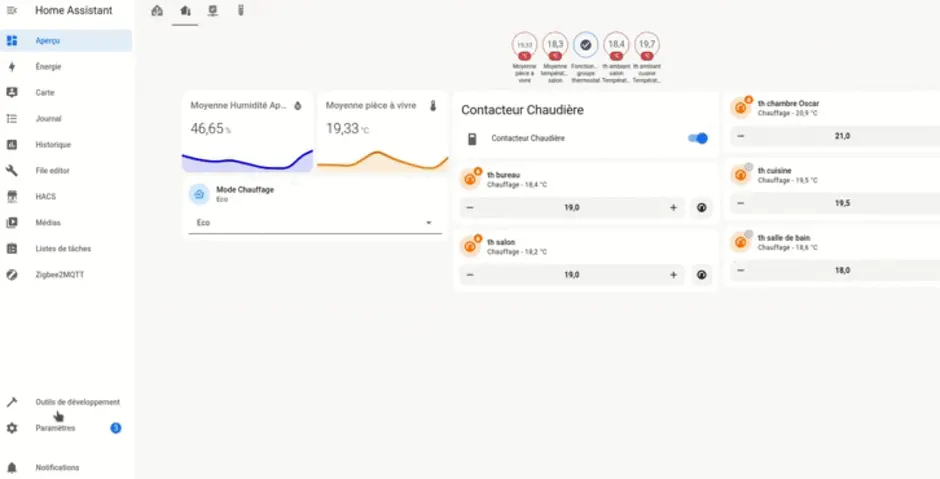
Final layout
Below is a small screenshot of the final heating management layout. For the thermostat card I went with an integration Mushroom

Conclusion
This article complements the video of August and Lulu, the new hosts of the Haade-lab YouTube channel. To answer the question, saving energy by home automation of all types of heating really works. With an installation costing 350€ it will take you a maximum of 2 years to amortize it. So if like August you want to save money, don’t hesitate to equip yourself.
For any help with installation, don’t hesitate to write, I will respond to your messages.

Articles that might interest you

Kincony B8M ESP32 8-channel MOSFET controller test for irrigation
I’ve been looking for a compact and silent multi-channel controller to drive my 24V DC irrigation system for quite some time. After testing Zigbee solutions like the Sonoff SWV or...

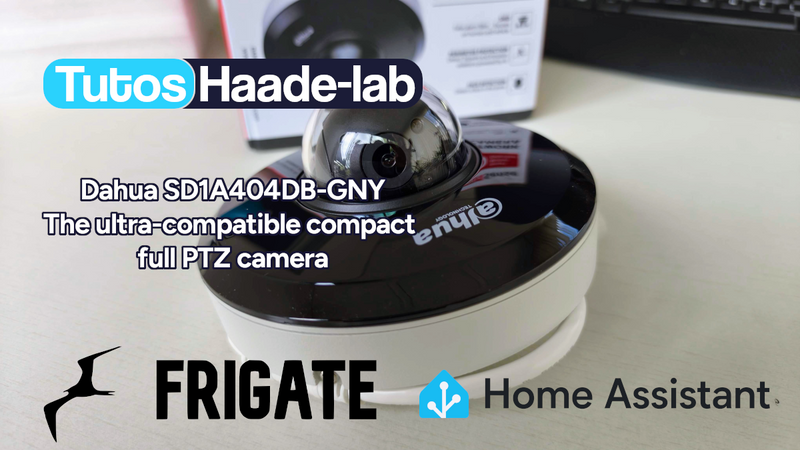
Dahua SD1A404DB-GNY the full option PTZ camera in Frigate
Following my Reolink Trackmix Poe camera test, I mentioned having found my ideal camera with a Dahua model. Well, here we are! Let me introduce the Dahua SD1A404DB-GNY, a compact...
SMLIGHT SMHUB NANO Review: The fully independent Linux smart home hub
After testing the SLZB-MR4U multi-radio dongle, I’m turning back to the SMLIGHT brand for a radically different yet equally exciting product: the SMHUB NANO MG24.
Comments