Mini power module 5V, 2A
By RQG
Mini 230V AC to 5V dc power supply module at 7, 1 and 2 A
This page has been visited ... times
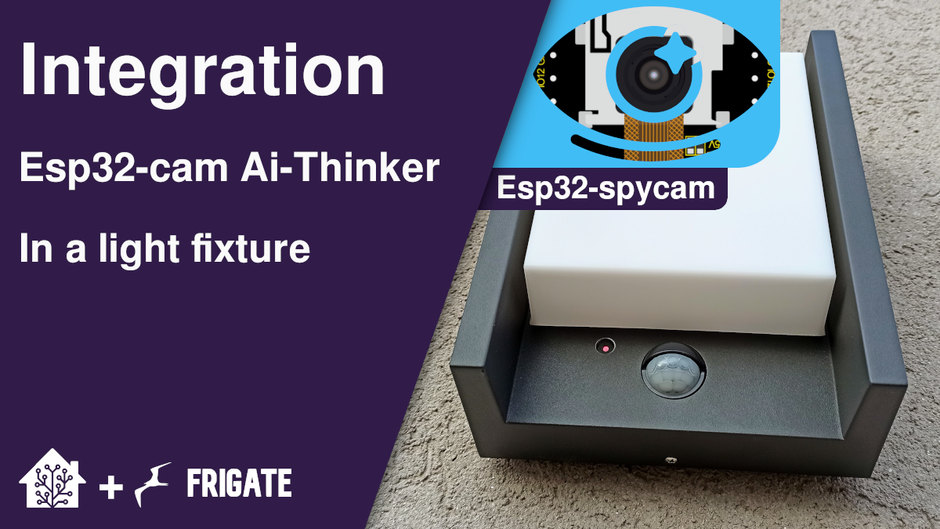
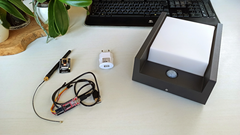
Simply, professional and effective Haade-lab tutorial for a cost of less than 10€, I will integrate an Ai Thinker Esp32-cam camera into a Philips light fixture fixed in the parking lot, non-intrusive because very little visible, * spy camera operation.* It will be controlled by the Frigate NVR and integrated into homeassistant thanks to the esphome service.
I wrote a complete tutorial on how to do it, you just have to read this article.
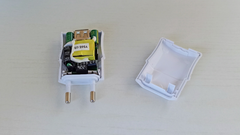
For my part, I had a very small Chinese transformer of 5v and 1a, that’s what I needed because the integration in the wall light is reduced. After opening it is enough to desolder the Usb connector, I instead welded two male female dupont wires so I can connect them directly to the 5v and Ground of the camera, on the other side I desoldered the terminals of the head 230v power supply and I connected two electrical wires recovered from an old lamp.
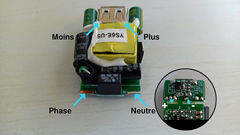
If you don’t feel ready or you don’t have a transformer on hand you can also buy a mini power module, personally I advise you to take a mini 1A unit, on the Aliexpress page you will have the choice and can go up to 2A, not bad
There it is a little more delicate but feasible and quite easily with a soldering station and using the hot air blower set to 330°c. Then you have to move the resistor 0805 as in the images below. The image on the left is the home position which defaults to the internal antenna. By modifying the position (right image) it is thus possible to use the connector of the external antenna.
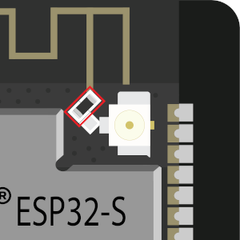
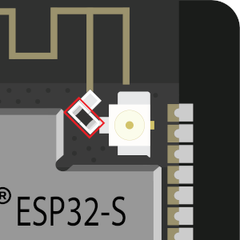
You will have to work in the vicinity of a voltage of 220V which is dangerous if you come into contact with an electrical conductor. Be careful of your manipulations, if in doubt cut off the power supply.
Now let’s move on to the integration step. I will try to do the simplest but also the cleanest and those without drilling holes except for the camera. Thus I will naturally avoid water ingress which could occur inside the wall lamp and cause the meter to trip.
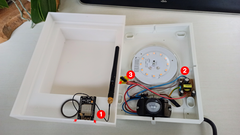
The Philips Arbor light wall lamp breaks down into 3 parts, an aluminum decorative shell which covers a shell and a relatively thick pvc counter-shell. For the integration of the optics the hole to be drilled is 8mm in the counter-hull and the aluminum hull. Unlike the assembly I made, remember to invert the lens and the Esphome module so it will be far from the lighting, the light wave of the lighting as well as the return of the hull will be more conducive to capturing images. ‘pictures.
To fix (transformer, antenna and optics of the camera), I used a hot glue gun, in case of error it is always possible to remove it. Be careful to stick the optics of the camera first and avoid sticking the ESP32-cam module too much. On the one hand you risk overheating the components, on the other hand in case of manipulation you risk taking off the components. However, if you still want to stick the camera module, do so on the bottom left and right edges (see the arrows on the screenshot). If you follow my recommendations in the paragraph above in bold, the glue points will be at the top left and right.
For the moment I put the antenna inside the wall light to see if this integration is viable. Otherwise I will see to deport her.
For those who don’t know Frigate, it’s a NVR dedicated to Homeassistant, radically efficient, powerful and compatible with Google Coral, if you don’t know, try it. Below is the config to integrate into frigate’s config.yaml file.
Nothing could be easier to connect, just plug the plus red on port 1 and the ground on port 2 of the esp32-cam Ai module -Think.
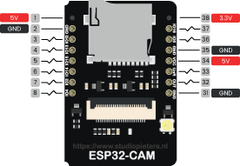
All you have to do is assemble the box and do a test before final assembly.
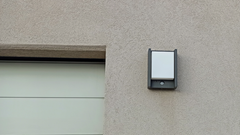
Here is a relevant integration, which, if you do well, will cost you less than 10€ excluding the wall lamp. Knowing that the wall lamps are constantly supplied with 230v, it is possible to integrate a camera there. Moreover, as they are equipped with a light detector, we naturally take advantage of this light to provide brightness in order to film after motion detection at night.
Copyright © 2026 Haade 🎉 by Nicoxygen
Comments