Integrate your electricity meter (teleinfo) in Home Assistant

This page has been visited ... times
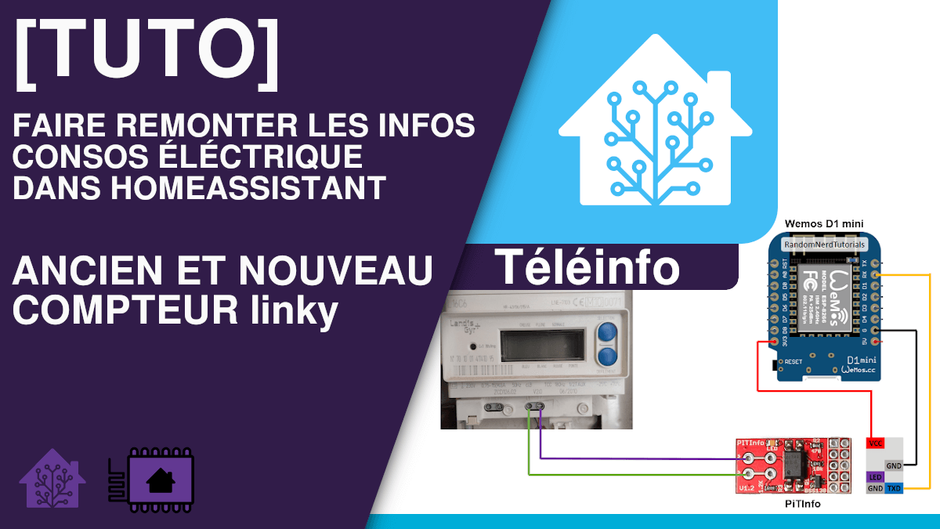
For my first post on the blog, I suggest you see together how to integrate the information from your electricity meter (teleinfo) into Home Assistant for around € 14. This tutorial is valid for old electronic meters as well as for new “Linky” communicating meters. To retrieve the information we will use a feature used by energy suppliers: Tele-information.
Prerequisites:
- Home assistant installed with up-to-date ESPHome
- An ESP8266 module of the Wemos D1 mini type and its power supply
- A PitInfo module
ESPHome programming
As the electricity meter is generally remote from your home automation system, I advise you to program and flash your ESP8266 first.
Summary of integration steps with ESPhome:
- To start, go to ESPHome you must create a new configuration by clicking on the green ‘+’ button located at the bottom right of the screen.
- Then fill in the various fields with the name of the device, the name of your wifi network (2.4 Ghz imperatively) as well as the associated password.
- The platform is of course ESP8266, for a wemos d1 mini the board is d1_mini
- Click on the ‘Next’ button and connect your Wemos D1 mini by USB to your PC, then click on ‘Connect’ and choose the COM port corresponding to your Wemos.
The flash may last a few minutes, leave the page open while waiting for the operation to complete.
After this operation, your new configuration will appear on the ESPHome Dashboard. Click on ‘EDIT’, we will complete the configuration file with the elements necessary for reporting information from the meter.
Below ‘logger’ add the following lines:
Finally, below the ‘captive_portal’ line add the rest of the code:
For Peak Hours / Off-Hours subscriptions:
For subscriptions at the Basic rate:
You can now upload the file by clicking on ‘INSTALL’.
So much for the programming part, now let’s go to the connection of the assembly.
Connection to the meter
Warning
You will have to work in the vicinity of a voltage of 220V which is dangerous if you come into contact with an electrical conductor. Be careful with your handling, if in doubt cut off the power supply.
We will in this part see how to connect our assembly, here is the wiring diagram:

Schéma de branchement
- Rx of Wemos on TXD of PiTInfo
- G of Wemos onGND of PiTInfo
- 3v3 of Wemos on VCC ofPiTInfo
- The two input terminals of the PiTInfo must be connected to I1 and I2 under the meter (These terminals are protected by a cover), there is no polarity on this side of the assembly
Linky counter: For information to go back to Home Assistant. The counter must be in ‘History’ mode, you can check this information by pressing the ‘+’ or ‘-‘ keys.
Lovelace
Back in Home Assistant go to ‘Integrations’. Normally your new Wemos should be recognized by HA and offered to you for configuration. If this is not the case, you will have to add it manually by clicking on ‘Add integration’ at the bottom right. Then look for ESPHome in the list and finally enter the IP address of the module.

Map of electric meter entities
So you get this card that you can add directly to Lovelace or create a custom card.
Here it is now over, you have all the information from your meter arriving on your HA. You are now free to manage this data, to create graphs, automations…!
EDIT: Due to a conflict in Home Assistant in the configuration for the “Base” tariff, it is necessary to modify the line id: index by id: “index_base” in the ESPHome code:
- platform: teleinfo
    tag_name: "BASE"
    name: "Index"
    unit_of_measurement: "Wh"
    icon: mdi:gauge
    id: "index_base" # <- modify line
Articles that might interest you

Kincony B8M ESP32 8-channel MOSFET controller test for irrigation
I’ve been looking for a compact and silent multi-channel controller to drive my 24V DC irrigation system for quite some time. After testing Zigbee solutions like the Sonoff SWV or...

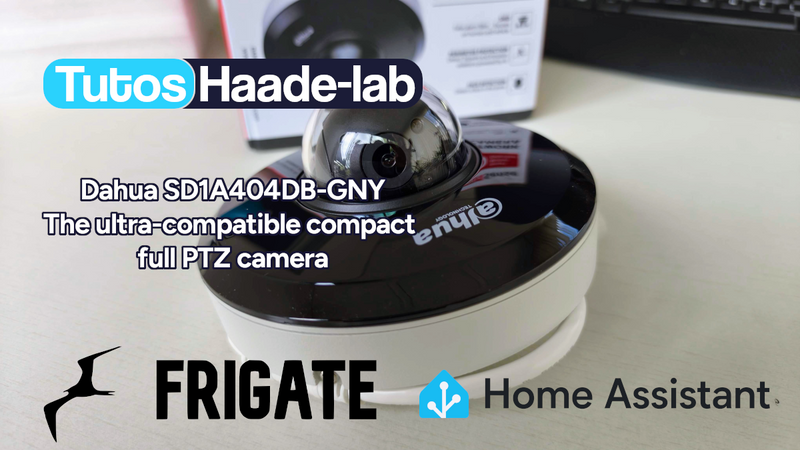
Dahua SD1A404DB-GNY the full option PTZ camera in Frigate
Following my Reolink Trackmix Poe camera test, I mentioned having found my ideal camera with a Dahua model. Well, here we are! Let me introduce the Dahua SD1A404DB-GNY, a compact...
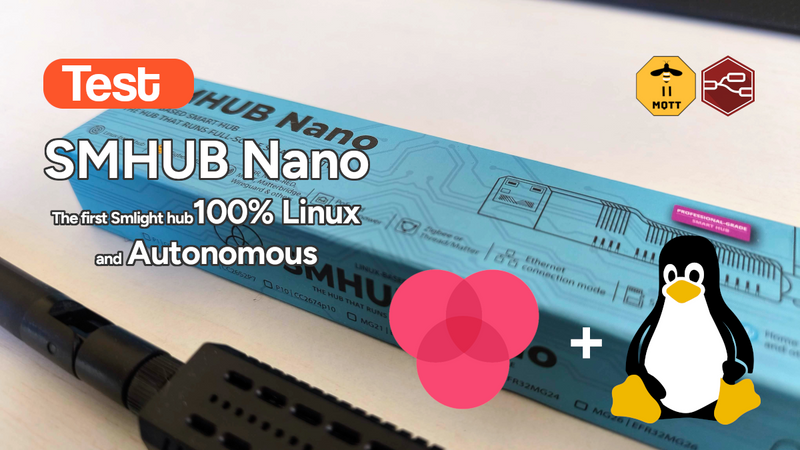
SMLIGHT SMHUB NANO Review: The fully independent Linux smart home hub
After testing the SLZB-MR4U multi-radio dongle, I’m turning back to the SMLIGHT brand for a radically different yet equally exciting product: the SMHUB NANO MG24.
Comments