Automate your garage door for 5€


Sommary
In this article I will simply show you how to automate your garage door for 5 € with homeassistant and an esp8266 7-30V module. The domotized motor is a hormann supramatic e3, but we could have used any brands of motorizations like Somfy because they are all equipped with electric motors operating between 18 and 24v.

In addition, they are almost all equipped with inputs for an external push button. The most difficult in this tutorial is to find a DC power supply to power our esp 8266 7-30V relay module, which obviously works in this electrical range.

Prerequisites to automate your garage door:
- Homeassistant installed with esphome
- A module usb FT232
- A module 7/30V Yunshan Lysignal esp8266 esp-12f
- Esphome installed in you’re system ( look dedicaced article )
- Know how to create a new Node and configure it
- device type: Espressif ESP-12E module
Nomenclature Yunshan-Lysignal esp8266

ESP8266 relay 7-30v Yunshan lysignal ESP-12F
A: Alimentation 7-30V + CC A1: ft232 connection (Tx, RX and GND) B: Boot jumper (in program position on the photo)
C: Contactor output
- Normally closed relay input (NC)
- Communication relay (COM) black wire
- Normally open relay contact (NO)
D: Optocoupler (push button switch)
- 5v (line + of the push button)
- GPIO5 (line - of the push button)
- GND (ground not connected to be connected with ground A1 for example, essential for the operation of the push button)
2: Blue led D4 of the optocoupler (on when the switch is on)
3: Red led D2 of the relay contactor (on when the relay is on))
4 : Blue wifi led (flashes when searching for the network and then fixed).
Connection
ft232 and esp8266 ESP-12F Yunshan-Lysignal
- On one side, a universal dc socket set to 9v, a minimum of 7v is required for programming.
- The other rx on tx
- next tx sur rx
- and for finish ground sur ground (GND)
- Connect everything to the raspberry pi

Parameterized file for ESPhome
STEP TO FOLLOW CAREFULLY
The module can be finicky to program so follow these steps carefully
- Connect ftd232 usb uart (jumper on 3.3v) to the raspberry pi (homeassistant) and to the yunshan / lysignal module (tx> rx, rx> tx and gnd)
- Then connect a minimum 7v and max 30v power supply in dc,
- Check the presence of the jumper on the connectors
- To be able to upload the code, the light must be light blue on led d4 after connecting the power supply (if it is red on led d2, we cannot upload even in usb. In this case disconnect the boot jumper and replace - then unplug the power supply for a few seconds.)
- Upload the code
- Once finished remove the jumper from the boot while leaving the rest powered (plug and ft232)
- Disconnect ft232
- Disconnect the power wait 20 sec and reconnect the power once started the blue led of the esp8266-12e module flashes several times the time to connect to the wifi network, once fixed your module is ok
- You can remove the rx / tx / gnd pins and the ftd.
Final rendering in Homeassistant
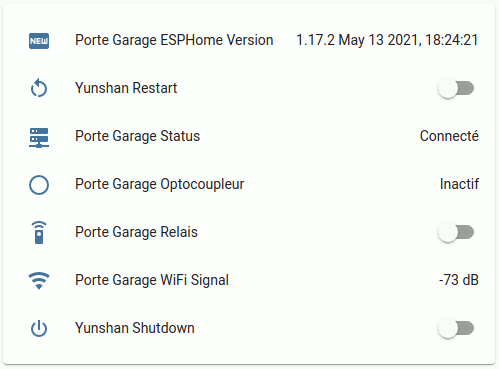
animated gif image on the operation of the yunshan 7-30v module integrated with esphome and homeassistant
Here is a complete return to properly automate your garage door for € 5 thanks to the help of homeassistant and esphome of the Yunshan-Lysignal esp8266 7-30V module, but beware the integration stage is not yet finished!
Creation of dry contact automation
To begin with, the no / nc pushbuttons operate in dry contact. In order to allow the state return to Off, we must create an automation which indicates to us when the state of the switch garage switch relay changes to on after 0.4 seconds the relay returns to off to be personalized according to the name given to your switch relay .
Hormann supramatic e3 control card

Hormann supramatic e3 engine controller board nomenclature In our case we want to automate a Hormann engine, the nomenclature is quite simple:
- The three-pin molex type plug that delivers 24v continuously so that’s what we need. Originally this - + - plug is intended to connect a back-up battery in the event of a power cut.
- Input for external push button, we will of course connect the relay above NO or NC on the + plug and the COM on the - plug. See the pictures of the module setup below.
Module setup and testing
Now that our module is ready and functional with homeassistant, we just have to put it in place in our engine. Warning! Before any intervention, do not forget to switch off the 230V current. Fortunately the connection is simple and there is room to integrate additional modules. As this is a 24V test, for the occasion we did not use suitable molex connectors and 0.75mm electric wire.


All you have to do is put everything together and incorporate it into the garage door motor unit and you can order your garage door for € 5 delivered via wifi via esphome and homeassistant, quite simply magic !.
We are currently experiencing a problem with the distance of the wifi antenna, part of an orange box without an external antenna, the dropout is regular, to alleviate this problem we are going to integrate an external antenna to the esp8266 chip, an article will be dedicated to This manipulation with earnings tests very soon, do not hesitate to follow us.

Articles that might interest you

Dahua SD1A404DB-GNY the full option PTZ camera in Frigate
Following my Reolink Trackmix Poe camera test, I mentioned having found my ideal camera with a Dahua model. Well, here we are! Let me introduce the Dahua SD1A404DB-GNY, a compact...


SMLIGHT SMHUB NANO Review: The fully independent Linux smart home hub
After testing the SLZB-MR4U multi-radio dongle, I’m turning back to the SMLIGHT brand for a radically different yet equally exciting product: the SMHUB NANO MG24.

OpenWrt tutorials, AP bridge mode, guest access, and network protection
I wanted to write a summary tutorial because I encountered several problems while setting up my secondary router, which runs OpenWrt. I finally found all the information in the official...
Comments