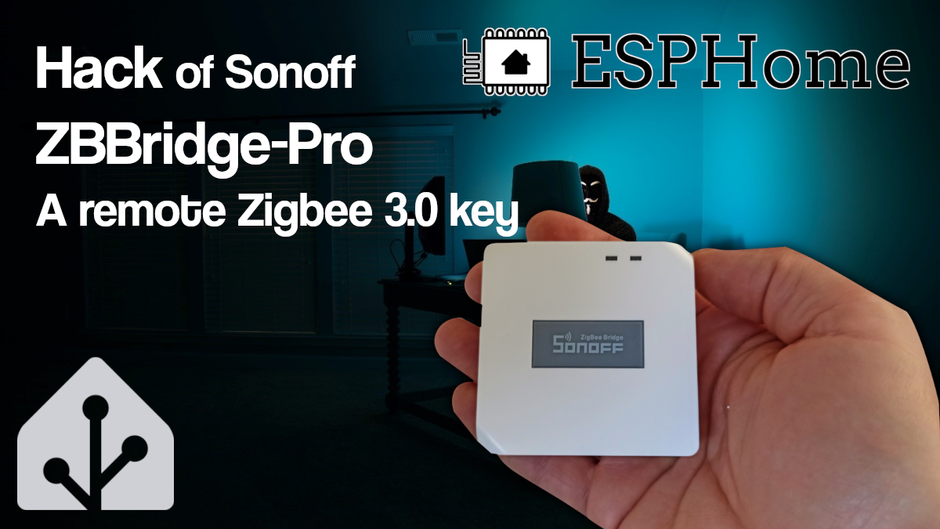
Hack Sonoff Zbbridge-pro and Esphome

This page has been visited ... times
Sommary
It no longer needs to be presented, already two years since the Sonoff ZBbridge-pro was released, it is an all-in-one control gateway (zigbee-wifi-bluetooth), exclusively dedicated to products from the Sonoff brand. But thanks to this tutorial you will be able to use it with ZHA or Zigbee2mqtt. You will find several discussions on the internet that will allow you to make ZBbridge-pro work in Home Assistant, but by installing Tasmota firmware. After some research I was able to hack the ZBbridge-pro directly with Esphome Firmware and thus make the Zigbee cc2652 key work with ZHA or Zigbee2mqtt all very easily.

Prerequisites
- Home-assistant installed
- Esphome installed
- usb uart ft232 conversion module
Presentation of ZBbridge-pro
Thanks to Itead for providing me with this module, you will see that the ZBbridge-pro has completely ordinary packaging in the emblematic colors of the Sonoff brand. No frills, instructions, a USB cable and a micro-module ZBbridge-pro.

This Sonoff gateway ZBbridge-pro costs between 20 and 30 euros, *it has the advantage of being able to use wifi, bluetooth and Zigbee 3.0, which makes it an all-in-one mini gateway *.
Let’s not waste time and move on to the Hack.
Esphome code injection
As written above, this tutorial allows you to achieve perfect integration into Home-Assistant thanks to the esphome module.
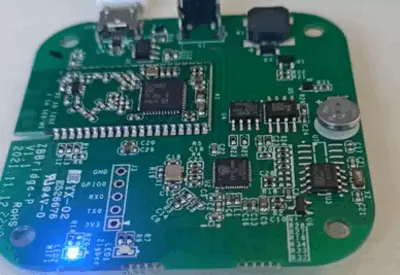
Start by connecting the ZBbridge-pro via USB using a Uart/ftdi module. To access the printed circuit and in order to connect the Ftdi you will need to remove the 4 mini-pads which hide the screws. Then nothing could be simpler, connect the ftdi according to the table below:

| Sonoff ZB Bridge PRO | FTDI programmer |
| 3V3 | Vcc/3.3v |
| GND | GND |
| RX | TX |
| TX | RX |
| GPIO00 | GND (on power on) |
Then create a new device in the esphome tab (note the name of the module $devicename must be attached without a hyphen) and paste the code below by adapting the passwords.
substitutions:
  devicename: zbbridge
  friendly_name: zb-bridge-pro

wifi:
  ssid: !secret wifi_ssid
  password: !secret wifi_password

  # Enable fallback hotspot (captive portal) in case wifi connection fails
  ap:
    ssid: ${devicename}_ap
    password: !secret zbbridge_ap_password

captive_portal:

ota:
  password: !secret zbbridge_ota_password

packages:
  remote-packages:
    url: https://github.com/haade-administrator/zbbridge-pro.git
    ref: main
    refresh: 0s
    files: [
      esphome/esphome.yaml,
      esphome/binary_sensor.yaml,
      esphome/bluetooth.yaml,
      esphome/light.yaml,
      esphome/output.yaml,
      esphome/rtttl.yaml,
      esphome/sensor.yaml,
      esphome/output.yaml,
      esphome/switch.yaml,
      esphome/text_sensor.yaml,
      esphome/uart.yaml,
      esphome/stream_server.yaml,
   ]

external_components:
  - source: github://oxan/esphome-stream-server
The Github repository did not happen on its own, I was strongly inspired by the source Github repository: Zbbridge-pro Giancky79 integration
All you have to do is validate the code and push everything onto the Sonoff ZBbridge-pro.
Once uploaded the last step of Esphome integration, go to the applications and configure your esphome device, click on the link below.

Module rendering in esphome:
At the time I write this post you will have access to all the necessary information, if you do not want to use the bluetooth tracker which is activated by default copy these lines of code into the esphome modules
esp32_ble_tracker:
  scan_parameters:
    active: false
What information is reported in esphome:
- zb_bridge_pro_fw_update (switch reset and firmware upload)
- zb_bridge_pro_uptime_readable (reading time)
- internal temperature
- IP adress
- mac address
- the voltage of the internal battery
and many more…
ZHA configuration
If you want to use the zigbee key in zha, you still have to configure the key as in the screenshots below, click on the link below to go directly to the key config:
Then open a second page and go to the esphome integration by clicking on the link below:
click on the button at the very top zbbridge firmware update and when the LED turns green confirms the integration of the key in ZHA, if you encounter a problem click again on the firmware update of esphome (the manipulation of the toggle firmware update is the same to update the firmware of the zigbee key). I hope this information is clear enough to you, otherwise contact me.
socket://[your_address_ip]:6638 // for me 192.168.1.217
baudrate: 115200
target: sofware

ou

socket://[devicename.local]:6638 // replace the device name with the alternate name in my case **zbbridge**
baudrate: 115200
target: software
I made a video integrating the zigbee key into zha with an integration fault. To do this, prepare the address of the key, then activate the fx switch in esphome and configure the key quickly, otherwise restart the operation and that will do it.
If you upgrade with the latest firmware discovery in ZHA will be done without needing to click on the fw switch.

Below is the light operation after activating the switch. The green light lets you know when to integrate or update the firmware:
zigbee2mqtt configuration
The configuration in Z2M is slightly different because you will make a call by TCP and not by socket
Go to the configuration.yaml file in the zigbee2mqtt folder and modify the following lines:
Ps: if you don’t know how to modify files in HA, install the File Editor module by clicking on the link below:
serial:
  port: tcp://[your_address_ip]:6638
  adapter: auto
Zigbee 3.0 firmware upgrade
By default the firmware dates from September 2022. You will find the firmware on the github Zigbee2mqtt takes the launchpad version
Z-stack zigbee2mqtt firmware launchpad cc2652p
To update the firmware of the zigbee cc2652p key follow the readme from the Haade repository dedicated to this tutorial installing latest Zigbee firmware
If you can’t do it, don’t hesitate to write to me
Sonoff documents ZBbridge-pro

Conclusion
This is a simple way to integrate a ZBbridge-pro key into home-assistant with Esphome firmware. The advantage of this zigbee key is that it is easily portable because it is linked via wifi, you can use the BLE sniffer (bluetooth 4.2) and the famous cc2652 zigbee 3.0 key, all in one.

Articles that might interest you

Kincony B8M ESP32 8-channel MOSFET controller test for irrigation
I’ve been looking for a compact and silent multi-channel controller to drive my 24V DC irrigation system for quite some time. After testing Zigbee solutions like the Sonoff SWV or...

SMLIGHT SMHUB NANO Review: The fully independent Linux smart home hub
After testing the SLZB-MR4U multi-radio dongle, I’m turning back to the SMLIGHT brand for a radically different yet equally exciting product: the SMHUB NANO MG24.

OpenWrt tutorials, AP bridge mode, guest access, and network protection
I wanted to write a summary tutorial because I encountered several problems while setting up my secondary router, which runs OpenWrt. I finally found all the information in the official...
Comments