Raspberry-pi 5 8GB
By Raspberry
Latest generation of raspberry-pi with 8GB of RAM
This page has been visited ... times

Why bother installing Home Assistant OS on dietpi when there is a ready-made image based on raspberry pi os Lite on the official website, or even simpler via the software imager developed by the Raspberry PI foundation which contains the HAOS image.
Haade.fr is a participant in the Amazon Services LLC Associates Program, an affiliate advertising program designed to provide a means to earn fees by linking to Amazon.com and affiliated sites.
I decided to do this installation for two main reasons.
The first, Dietpi is an ultra light debian image much lighter than raspberry pi os and those in all areas, you just have to look at the table edited below. How did they manage to do that!, simply by removing a lot of software and libraries by default and optimizing the OS, so we can benefit from the maximum power of its SBC.
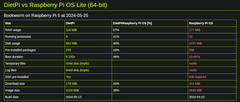
The second is linked to the first despite this lightening we will find a panel of functions to activate never unequaled and thus we will be able to install easily a pharaonic number of software via dietpi-software, configure the functions of the raspberry pi via detpi-config and the cherry on the cake I did not encounter any problems.
But the features don’t stop there!
If you like ultra-light OS, like Raspberry Pi, Odroid and so on, then DietPi is for you. It is an operating system based on a lightweight Debian in order to consume as little CPU and RAM as possible.
DietPi | A minimal image based on a highly optimized Debian minimal OS. DietPi is extremely lightweight, with low process/memory footprint features and DietPi-RAM log installed by default, to get the maximum performance from your device.
I did the installation on an old raspberry pi 3B+ that was lying around in one of my drawers with 1GB of RAM, so to speak, it’s light, but it’ll do, given the announced performances I don’t doubt it too much!
To start, download the corresponding image to your SBC and copy it to an sdcard using Balena Etcher for example. So far, nothing too complicated, at least I hope so😁.
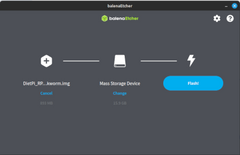
Once the image is copied we will automate the first installation, yes you heard correctly with Dietpi you can modify 2-3 text files and configure what you want before the first launch and that’s great.
Great news Dietpi proposes to automate the first installation by simply modifying text files at the source of the sd card.
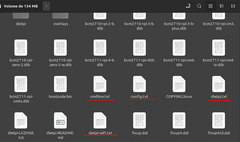
Let’s start with this file which is the main file to configure if you want to customize the first launch, I’m not going to go through all the functions, but rather those that seem relevant to me for all new installations.
Yes because you will quickly realize that you can configure a lot of things 👌.
Also I want to point out that all this configuration is of course modifiable later by the graphical interface and via the command dietpi-config
I mainly modified the first parameters of language/regions without needing to touch the other default parameters like the wifi connection because in my tests the raspberry pi is connected in rj45.
If you want to find all the configuration information of dietpi you can have them via the official documentation very well done
If you have rather specific questions do not hesitate to consult the forum dedicated.
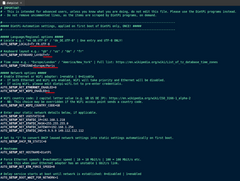
Below is the file modified for the tests of this article.
I also took a screenshot of these edits.
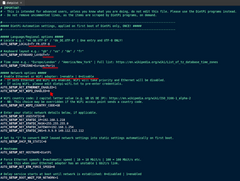
##### Language/Regional options #####
# Locale e.g.: "en_GB.UTF-8" / "de_DE.UTF-8" | One entry and UTF-8 ONLY!
AUTO_SETUP_LOCALE=fr_FR.UTF-8

# Keyboard layout e.g.: "gb" / "us" / "de" / "fr"
AUTO_SETUP_KEYBOARD_LAYOUT=fr

# Time zone e.g.: "Europe/London" / "America/New_York" | Full list: https://en.wikipedia.org/wiki/List_of_tz_database_time_zones
AUTO_SETUP_TIMEZONE=Europe/Paris

##### Network options #####
# Enable Ethernet or WiFi adapter: 1=enable | 0=disable
# - If both Ethernet and WiFi are enabled, WiFi will take priority and Ethernet will be disabled.
# - If using WiFi, please edit dietpi-wifi.txt to pre-enter credentials.
AUTO_SETUP_NET_ETHERNET_ENABLED=1
AUTO_SETUP_NET_WIFI_ENABLED=0
If you want to do a first wifi installation you can of course configure the network upstream, still in dietpi.txt add 1 in network options to the line AUTO_SETUP_NET_WIFI_ENABLED=1, you can leave 1 too, AUTO_SETUP_NET_ETHERNET_ENABLED=1 it doesn’t change anything because if wifi is enabled it will be used by default. Then you will have to adapt the file dietpi-wifi.txt.
In this file you will be able to enter all the information about your networks.
if you want to configure several wifi networks to connect to one of them it is possible.
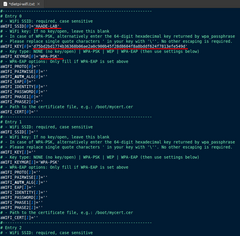
You will have to modify 2 lines if your networks are in wpa-psk:
To find this pass under linux it is very simple open a terminal and enter the command: wpa_passphrase SSID PASSWORD

Save the file and that’s it, your SBC will automatically connect to the wifi network on first launch, Magic 🪄
The file as marked in the title is there to optimize the performance of the raspberry-pi 3B+, personally I haven’t touched it, but as for the rest everything is easily configurable via the dietpi interface connected in ssh with the command dietpi-config tab performance options
Find under the links below configurations with the official documentation of raspberry-pi.
Documentation configuration raspberry pi
Github official firmware optimizations for raspberry-pi
In order to prepare the installation of home assistant supervised installer you will have to add a command line after the code already available, and you will see a little further down you will have to copy this file into the /firmware subfolder. This way home assistant works best.
apparmor=1 security=apparmor systemd.unified_cgroup_hierarchy=0
On the raspberry pi 3B+ the first boot took less than 2 minutes to launch knowing that I made some modifications in the dietpi.txt file. The ssh connection is active by default, it’s a plus and during the first ssh connection dietpi-update launches automatically.
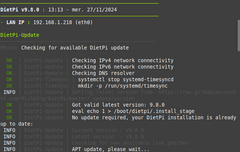
To know the ip address connect the SBC in hdmi so you will have the dietpi GUI interface available with your dedicated ip address as well as the root identifiers and passwords displayed. I decide to connect in ssh ssh -p 22 my-ip -l root
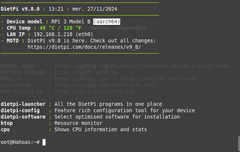
In the image above you will have access to all the data and settings of your installation, a fulltitude of options, that’s great with among other things:
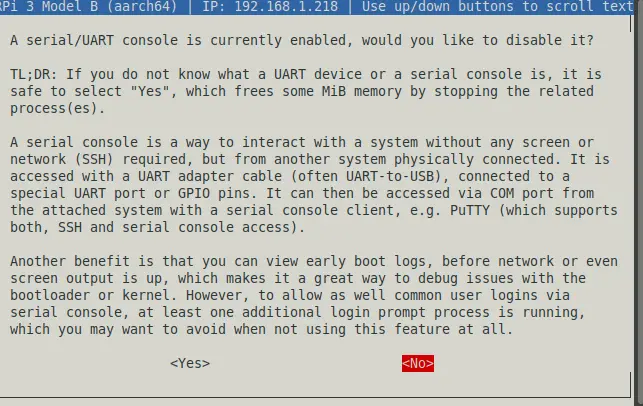
I made a little recap in Gif format of the procedure prompts during the first installation.
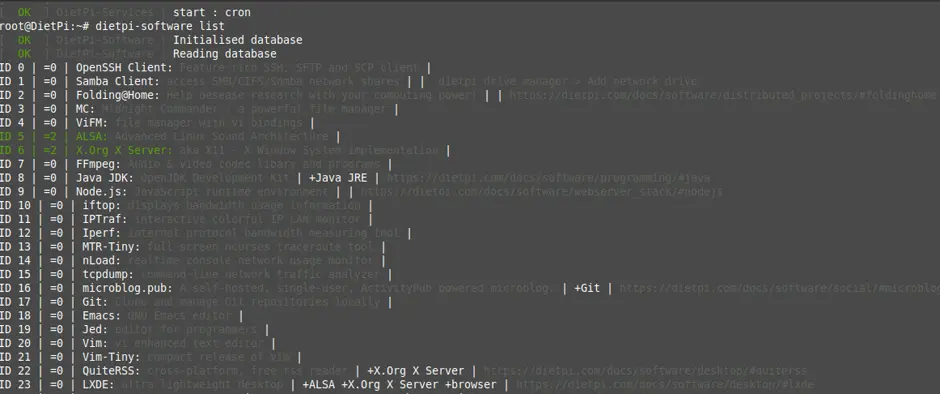
To realize all the power of dietpi go directly to the page of software with automatic installation available in dietpi, it’s impressive, you can directly type the command in the terminal dietpi-software list and with a single glance you will see all the software compatible with the architecture of the SBC.
Link dietpi sofware on the official site
During the first installation you will be asked whether or not you want to let the dietpi server collect information on your statistics.
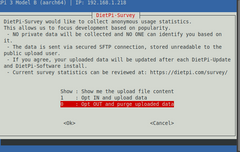
Personally I checked 0, feel free to pass on the information.
If you do a search in dietpi-software, you will be able to see the presence of an automated function for the installation of Home assistant, but not of Home Assistant OS, it was considered but conflicting because by default Dietpi uses the network manager ifupdown while HAOS uses network manager which makes network management impossible in dietpi-config after switching to network manager, but fortunately for us it is not too serious for the future.
So once the dietpi installation is operational and updated on your network, you just have to apply the following commands:
sudo su - # to switch to administrator modethen let’s install home assistant supervised installer starting with the dependencies:
apt install \
apparmor \
bluez \
cifs-utils \
curl \
dbus \
jq \
libglib2.0-bin \
lsb-release \
network-manager \
nfs-common \
systemd-journal-remote \
systemd-resolved \
udisks2 \
wget -y
Then we recreate the network file for network manager, because I remember the first one was created by ifupdown:
sudo mv /etc/network/interfaces /etc/network/interfaces.old # we rename the interface to a .old file so as not to lose the previous informationand we end with a reboot
rebootAfter rebooting the system goes back to permanent sudo mode
sudo su -We install the docker library
curl -fsSL get.docker.com | shPS: When you access home assistant after configuration if a docker root error comes up you just have to restart the whole system and home assistant will correct this error.
Go ahead and get the latest version of os-agent for your architecture, mine is aarch64
Now let’s move on to downloading, installing and testing the functionality of os-agent:
wget https://github.com/home-assistant/os-agent/releases/download/1.6.0/os-agent_1.6.0_linux_aarch64.deb # we download
dpkg -i os-agent_1.6.0_linux_aarch64.deb # we install
gdbus introspect --system --dest io.hass.os --object-path /io/hass/os # we check
Now let’s create the firmware folder, then make a copy of cmdline.txt in /firmware.
mkdir /boot/firmware
cp /boot/cmdline.txt /boot/firmware/
Finally copy the entire command below to install Home Assistant OS.
wget -O homeassistant-supervised.deb https://github.com/home-assistant/supervised-installer/releases/latest/download/homeassistant-supervised.deb
apt install ./homeassistant-supervised.deb
On supprime les fichiers préalablements téléchargés et situés à la racine.
rm -rf homeassistant-supervised.deb os-agent_1.6.0_linux_aarch64.debFinished with a small reboot.
rebootHere is Home Assistant OS installed on Dietpi 🥳
Haade.fr is a participant in the Amazon Services LLC Associates Program, an affiliate advertising program designed to provide a means to earn fees by linking to Amazon.com and affiliated sites.
Dietpi software is a gem if you want to control your raspberry-pi or install options easily, like the control of the leds, it will allow you to easily do system updates, to create a backup, in short a whole range of functions. And all this on an optimized and ultra light system, in short, only happiness.
I highly recommend dietpi to everyone.
Copyright © 2026 Haade 🎉 by Nicoxygen
Comments